Gamemaker Studio Horizontal Shooter - Basics - Creating a player character
Creating the player object
We’ve made a sprite to represent the player. Let’s use it on an object that the players will be able to control.
On the objects folder, right click and create a new object.
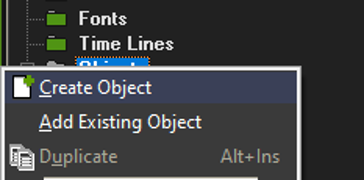
Setting up the object basics
As usual, we’ll name the object following a convention
- Convention it o_name
- o_ for object
- name to easily know what it is
- I use no capital letters to keep things simple and consistent Then assign the player sprite you created in a previous tutorial
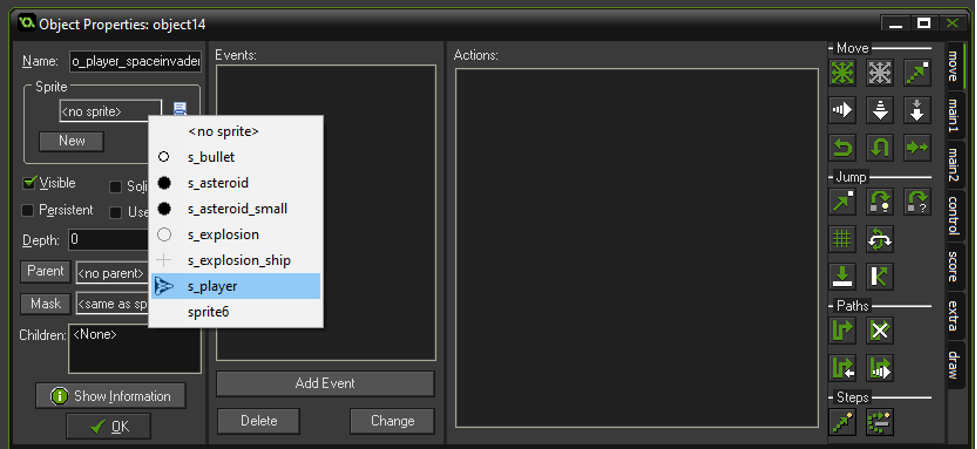
First way of adding interactions
In the events column, you’re going to select what triggers an action. We want the player object to move left when the player presses left. To do this we can create an event from Keyboard > Left. This means as long as the Left arrow is pressed, the player object will continue doing whatever we assign to that input.
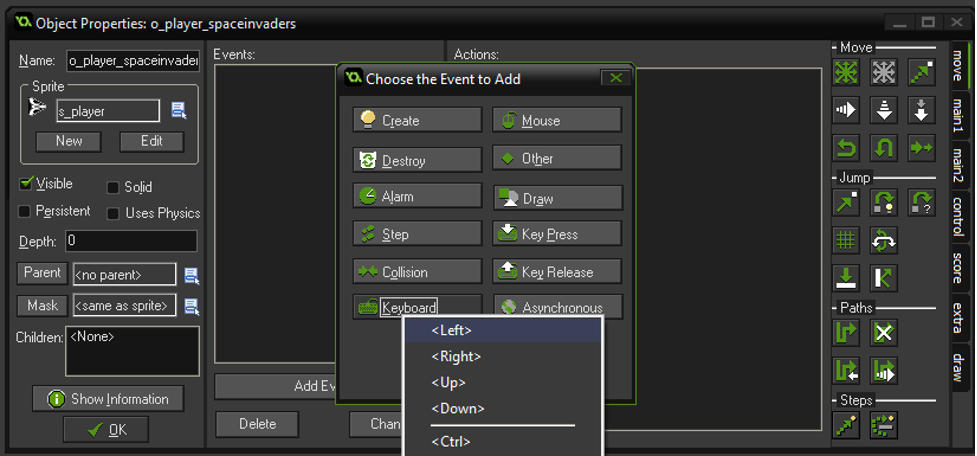
Now you should have an event called “Left” in that column. Click on the control tab way on the right, then drag and drop the “Execute Code” block into the right “actions” area. This will allow you to write code, which will be executed whenever left is pressed. As soon as you release, it will automatically open a text editor on top of the object properties window, which should now look as below.
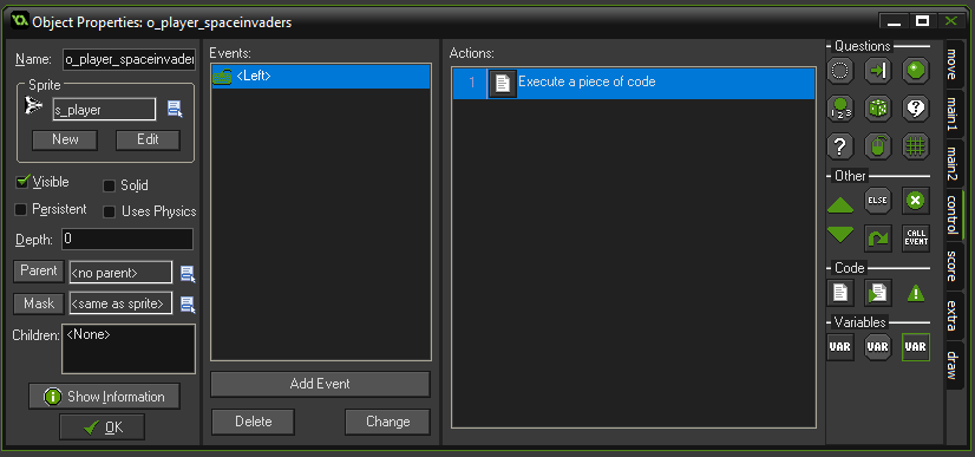
Double click the “Execute a piece of code” item in the actions column if you need to re-open the text editor window. We’re now going to write our first bit of actual code. We’ll use 2 lines of code:
///move left
x = x - 4;
///move leftis a comment, it won’t be used by the program. It’s just a reminder of what the code below is supposed to do.xis the variable that stores the horizontal position of the object on the screen.=means we assign a new value to xx - 4is the new value of x. It means we take the current value of x and remove 4 from it. For example, if the object was at 44 pixels from the left edge of the game screen, it will change to 40, 36 and continue decreasing as long as the left key remains pressed etc.;again indicates that the code line is finished.
Now there is a lazy way to tell the computer to do exactly the same thing,
Instead of x = x - 4;
You can write x -= 4;
-= means update the existing value on the left side by substracting whatever is on the right side. If you wanted to add instead of substract, you can do so too by writing += instead too.
Adding the player object to the room
Double click the room your created earlier, and go to the objects tab.
In here, you can select the player object you just created, and add it to the room by clicking anywhere in it once.
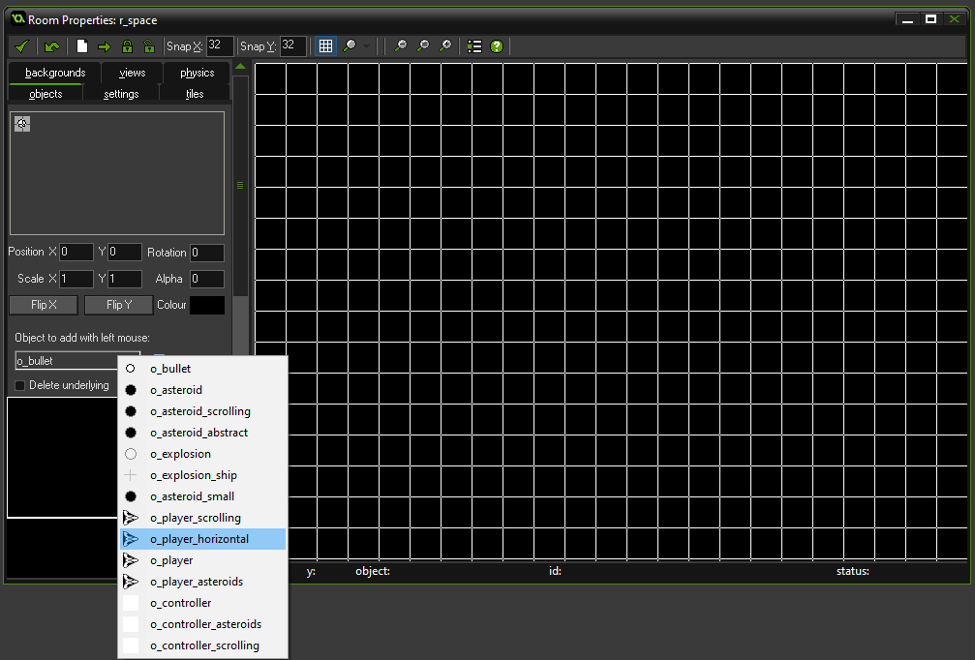
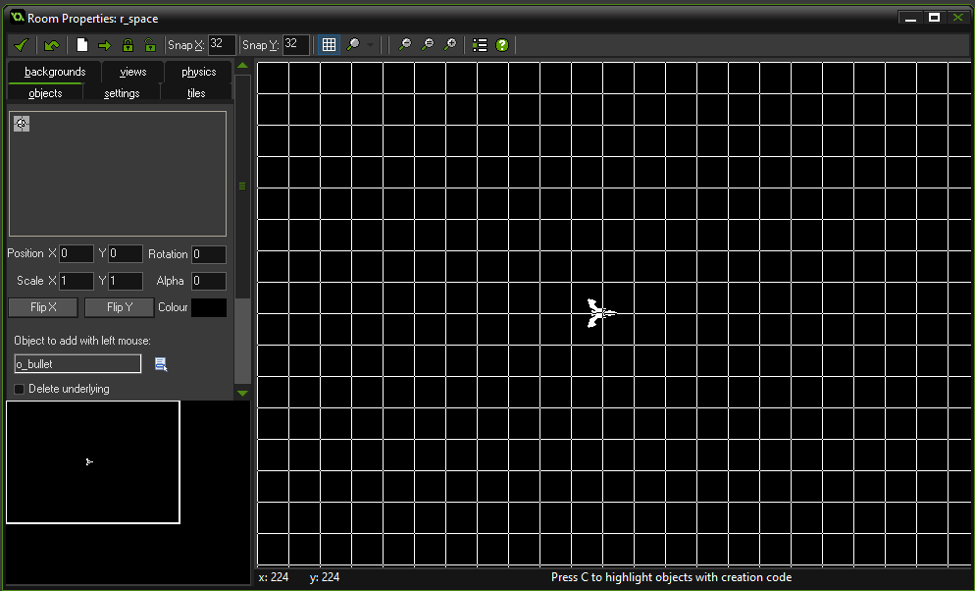
I put my player object somewhere in the middle for now to make it easier to test the controls in all directions.
Practice
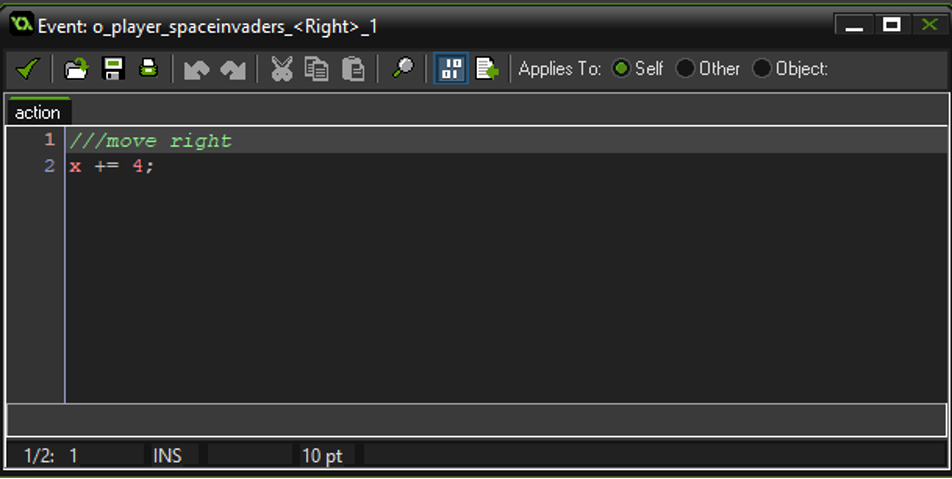
Create an event for the right key and make the player move towards the right.
Example solution
Event:
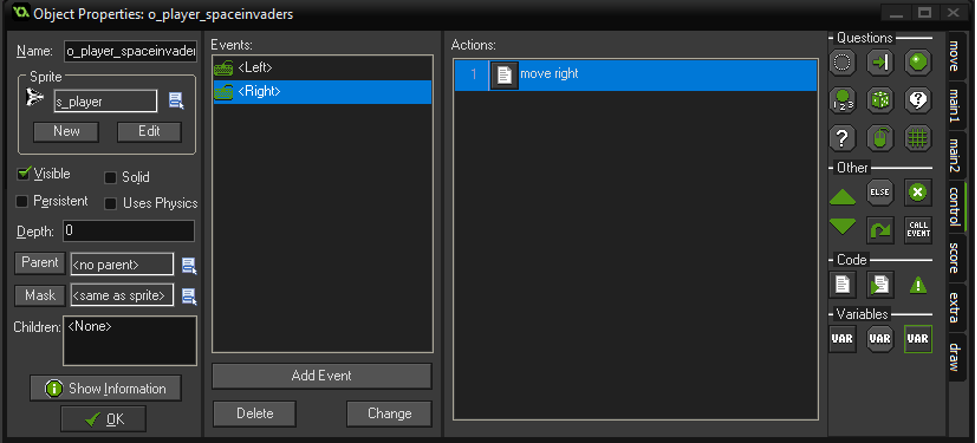
Action:
Coordinates in Game maker
Every object has a position defined by two coordinates x and y. In game maker, the origin of the axes (x=0, y=0) is the top left corner of the screen. The value of x defines an object’s horizontal position. The value of y defines an object’s vertical position. Points of the screen that are further away from the left edge of the screen have an increasingly higher x value. Points on the screen that are further down have an increasingly high y value.
Practice
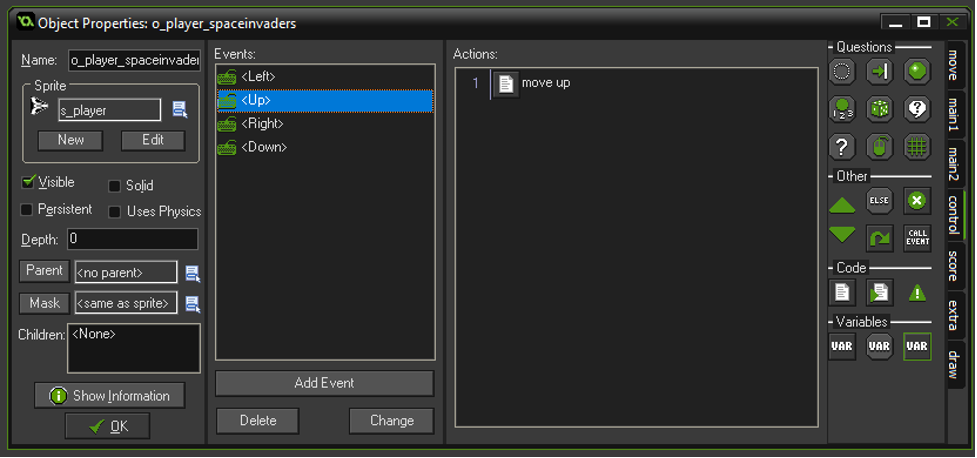
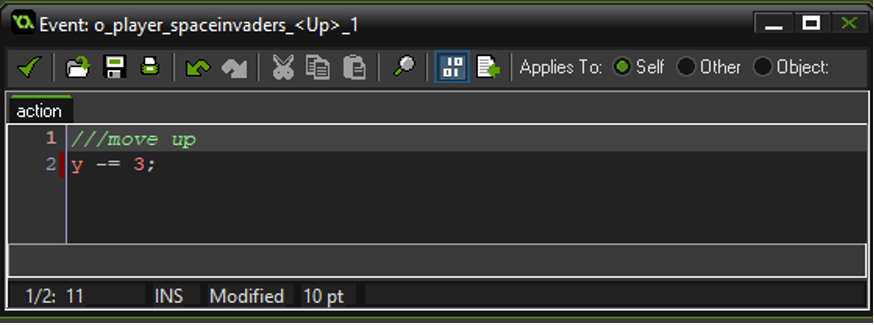
Add events to the player object so that it moves up when the player presses the up key and down when the player presses the down key.
Tips:
- Remember the vertical position of the ship is defined by the y variable.
- Remember vertical positions start at 0 at the top of the screen and get bigger as the object moves down.
Example solution:
Events:
Code for moving up:
Commenting properly
It’s good practice to add comments above each code block that does something, and on particularly complex lines of code.
- It makes it easier to remind yourself what the code was supposed to do if you wrote it long ago.
- It makes it easier to find a bit of code you want to update if the code gets really long
- It makes it easier for someone else to understand your code, for example if they read it to help you figure out why something doesn’t work and how to fix it.
Comments can be written with just // at the start of each line instead of ///.
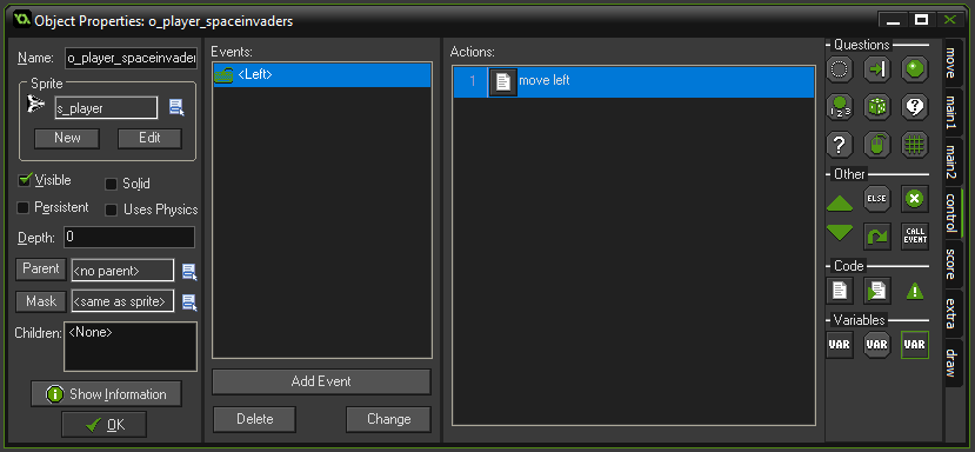
The nice thing in game maker is that using /// on the first line of text will turn that comment into a title in the actions list. That can make it easier to find which code did what without opening it to check what’s inside.
As you can see, in my example, it shows “move left” instead of “Execute a piece of code” which is otherwise the default text.
Articles on similar topics
Game Maker Studio tutorials
Game development tutorial, Gamemaker development tutorials, Game Maker studio programming, Programming video games for beginners,
Gamemaker Studio Horizontal Shooter - Basics - Creating sprites
Game development tutorial, Gamemaker development tutorials, Game Maker studio programming, Programming video games for beginners,
Gamemaker Studio Horizontal Shooter - Basics - Creating a room
Game development tutorial, Gamemaker development tutorials, Game Maker studio programming, Programming video games for beginners,
Gamemaker Studio Horizontal Shooter - Basics - Prevent the player from leaving the screen
Game development tutorial, Gamemaker development tutorials, Game Maker studio programming, Programming video games for beginners,
Gamemaker Studio Horizontal Shooter - Basics - Scrolling backgrounds
Game development tutorial, Gamemaker development tutorials, Game Maker studio programming, Programming video games for beginners,
Game Maker Studio tutorials
Game development tutorial, Gamemaker development tutorials, Game Maker studio programming, Programming video games for beginners,
