Axure - Creating menus with dynamic panels
- Creating dynamic panels with axure
- When to create dynamic panels ?
- Creating menus with Axure dynamic panels
- Since Axure 7, it has become a lot easier.
Creating dynamic panels with axure
Dynamic panels are a powerful tool of Axure. They allow users to add interactive areas to their wireframes or mockups. Creating them is easy too.
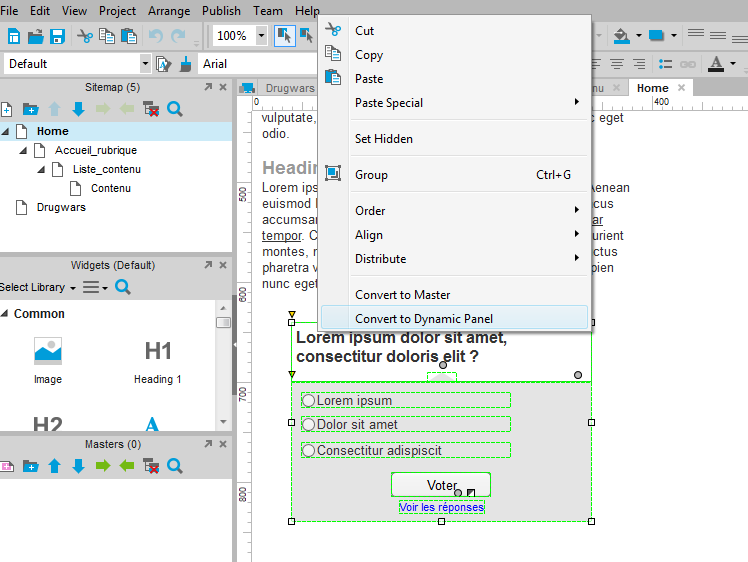
Either create the content you want to add to a dynamic panel, select all of it, and right click. In the contextual menu, select “convert to dynamic panel”. Done!
You can add more “states” to a dynamic panel by double clicking it.
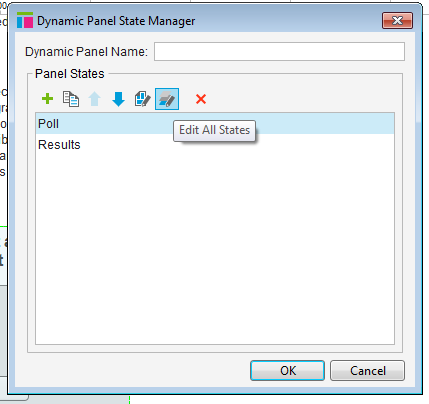
Create states, rename them. Double click a state to edit its content. It will open as a new tab, as if you were editing a separate page.
The state’s content can be displayed at will by using the “set panel state to state” function. This link will take you to a complete tutorial on how to manage dynamic panels.
When to create dynamic panels ?
Often, I see Axure users transform groups of content into dynamic panels, in order to manipulate them more easily. Unless you intend to create a single interaction on a group of widgets, I recommend using groups, rather than dynamic panels.
Dynamic panels are useful for simulating many interactive behaviors though, and that’s what they should be used for. First of all, menus.
Creating menus with Axure dynamic panels
Dynamic panels can be used to easily create flyover menus. For example, in a web page, you can create your XL menu directly below your header – either in a master, or before creating the actual content below the header. Then, convert your menu to a dynamic panel.
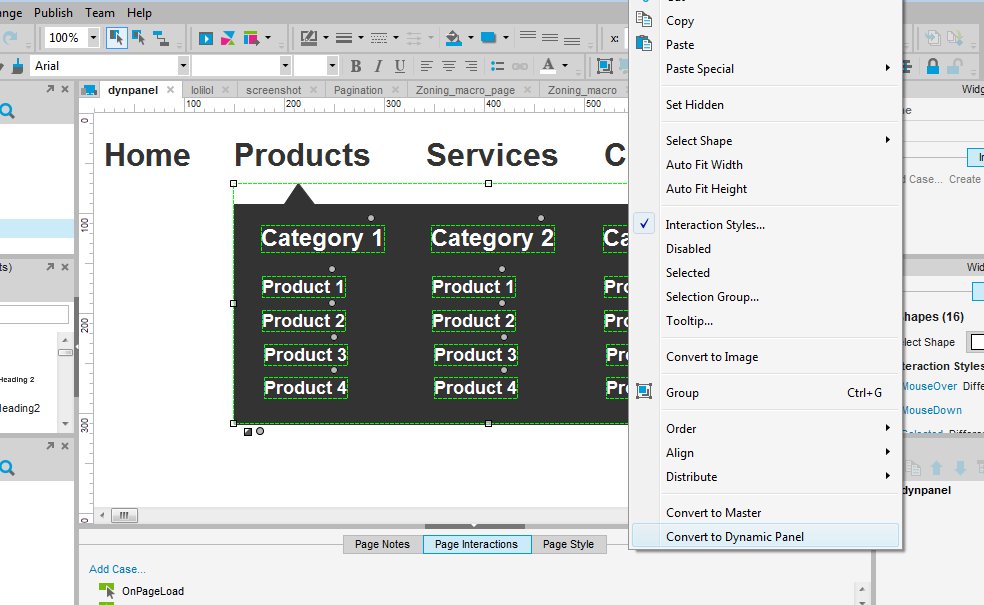
In your main menu, we are going to define that on mouse over, the panel should be displayed. On mouse out, it should be hidden again.
To do this, you used to need to add a “show panel” action, “on mouse enter” and a “hide panel” action “on mouse out”. It didn’t always work well, so you sometimes needed to add a hotspot around or behind the menu with an action “on mouse enter” to “hide panel”.
Since Axure 7, it has become a lot easier.
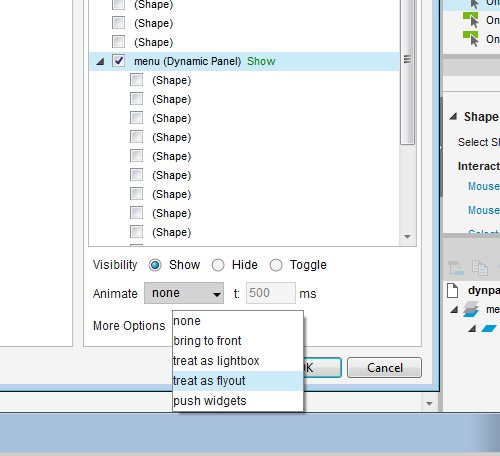
Select the menu item, and add an action “on click”. Select “show panel” and chose the menu in the list.

Then, in the options below the list, select “treat as flyout”. You are done.
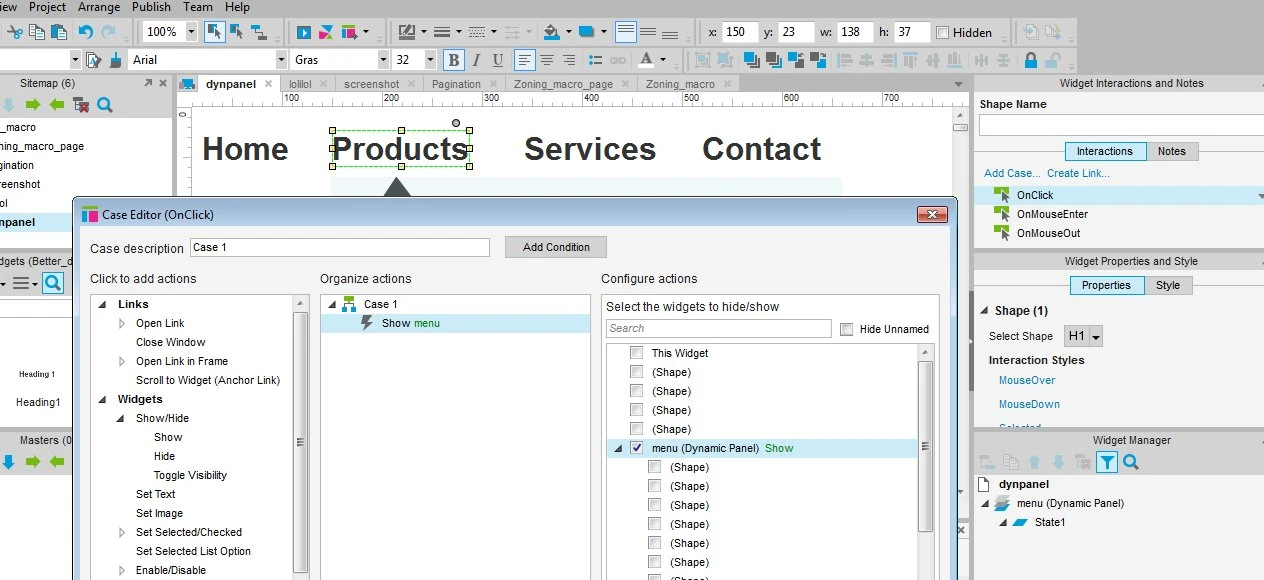
You can use the same procedure to create a lightbox: simply select “treat as lightbox” in the options list. On click, instead of opening as a mouse over menu, the panel should be presented with a greyed out backgroud. A click outside the panel will close it again.
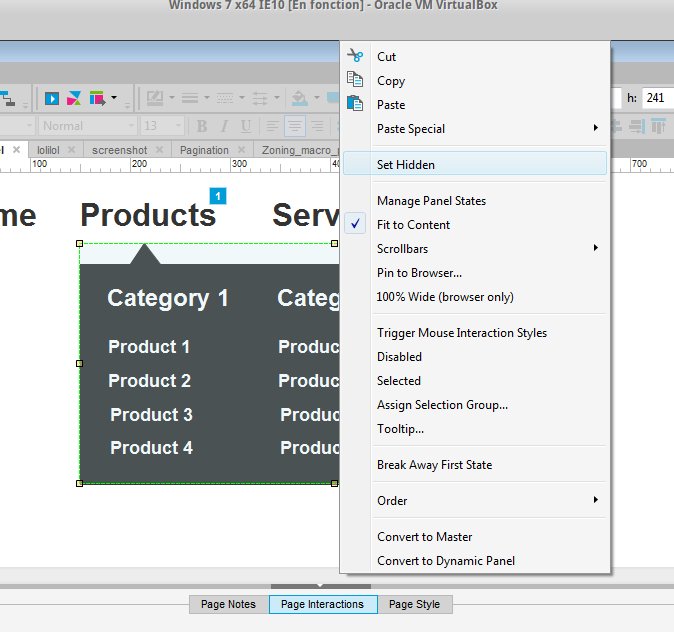
Now simply set the panel as hidden by default. Your menu will work perfectly fine.
In our next tutorial about dynamic panels, we will learn to build timed image sliders.
In the meantime, if you have any questions of tips to share, feel free to add a comment!
Articles on similar topics
Axure basics - create a browsable interface
Axure training, Beginner Axure tutorial, Training in wireframing interactive prototypes, Interactive wireframing,
Axure basics - creating within-page interactions with anchors and visiblity
Axure training, Beginner Axure tutorial, Training in wireframing interactive prototypes, Interactive wireframing,
Axure basics - creating within-page interactions with dynamic panels
Axure training, Beginner Axure tutorial, Training in wireframing interactive prototypes, Interactive wireframing,
Axure - optimal widget use to iterate painlessly
Axure training, Training in wireframing interactive prototypes, Interactive wireframing,
Axure - How to create Masters and use them efficiently in Axure
Axure training, Training in wireframing interactive prototypes, Interactive wireframing,
Advanced Axure - Creating repeaters
Axure training, Training in wireframing interactive prototypes, Interactive wireframing,