Axure basics - create a browsable interface
- Add a link using the create link shortcut
- Create a link and customise its options, using the on click dialog.
- Create a link back to a previous page
We have presented basic features of Axure and the general layout of the interface. In this post, we are going to learn how to make a browsable site with basic interactions.
Create a static page by dragging widgets into the work area.
Add a link using the create link shortcut
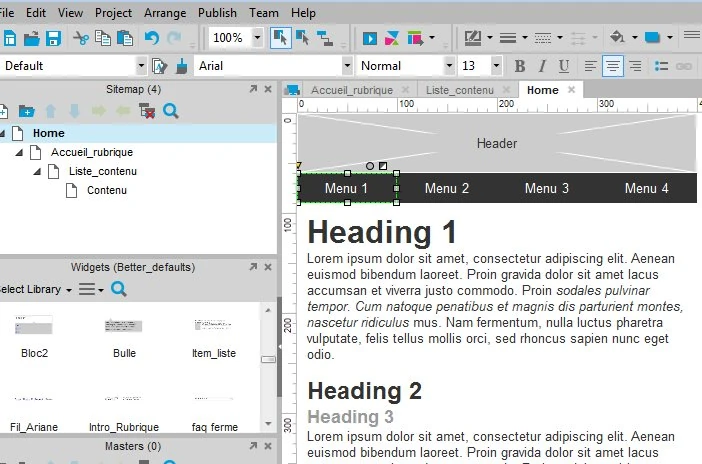
Once you have a page as you desire, select the element you want to create a link on, by clicking on it. In this case, we want to create a link from the “Menu 1” entry, to the sub page. You will know it is selected because of the green lines and small manipulator icons that will appear around your selection.
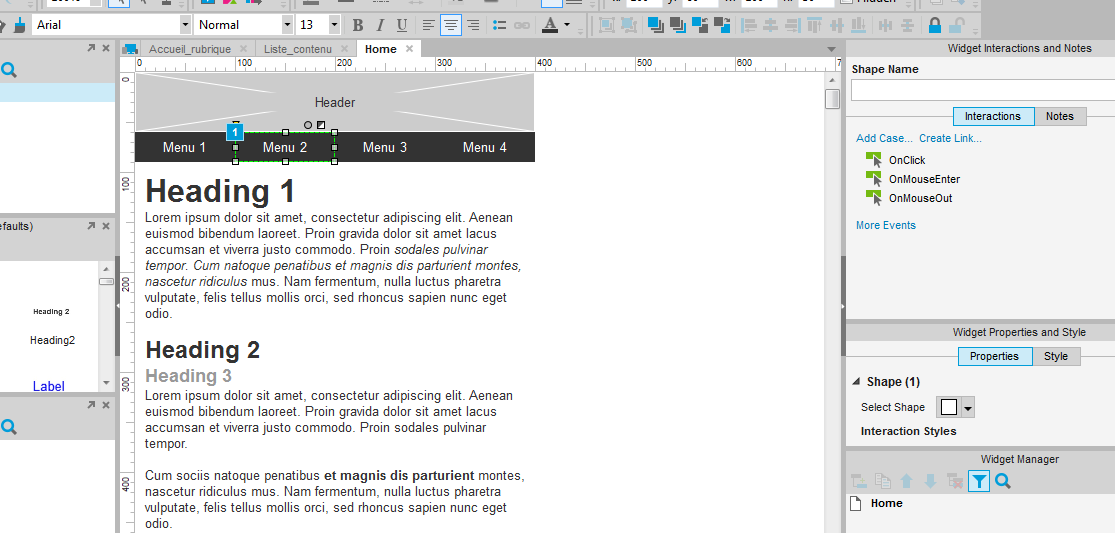
On the right side of the interface, the interaction panel shows you several options :
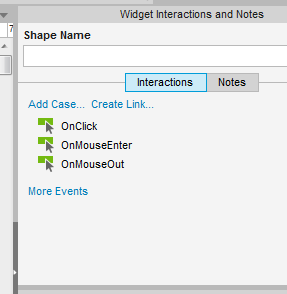
on click : creates an action when the user clicks on the selected item
on mouse enter : creates an action when the user places his mouse on the selected item
on mouse out : creates an action when the user moves his mouse out of the selected item
we are interested in the second blue link called “create link…” click on it, you will see the list of pages and can select one to add the link to it.
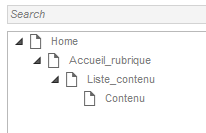
If you have many pages, you can filter them by typing its name in the field above the list.
Ass soon as you have clicked the page, you will have a confirmation that the link was created successfully through these two indications :
In the interaction area, below ‘On click’, you will see a new “case” that says “open (your page) in current window.
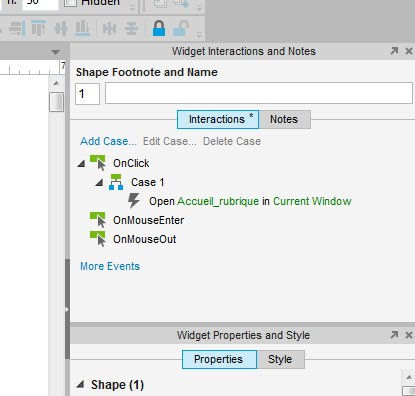
Also, if you look at the button you just make cliackable, it bears a small blue square saying 1, which indicates there is an interaction mapped to the button, and it is the first one you created.
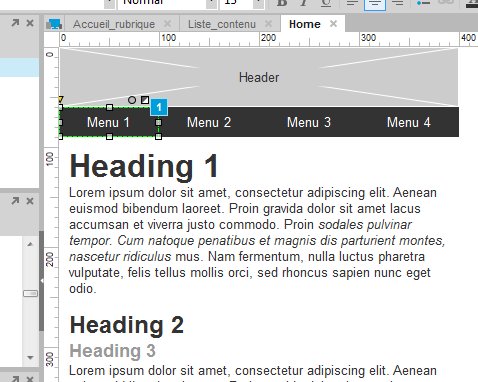
This is perfect and really quick if you want to add a new link to a page, that opens in the same window. If you need more advanced options, or want to edit a link, you will have to use the “on click” dialog.
Create a link and customise its options, using the on click dialog.
Now, select the second button you want to make interactive in your prototype. You will notice on the right panel that the links from the first one are not displayed anymore. That area only shows the information relative to the item that is selected. It also only works by selecting one item at a time.
To add a link, this time, we will click on the “Onclick” interaction.
You should see the following dialog :
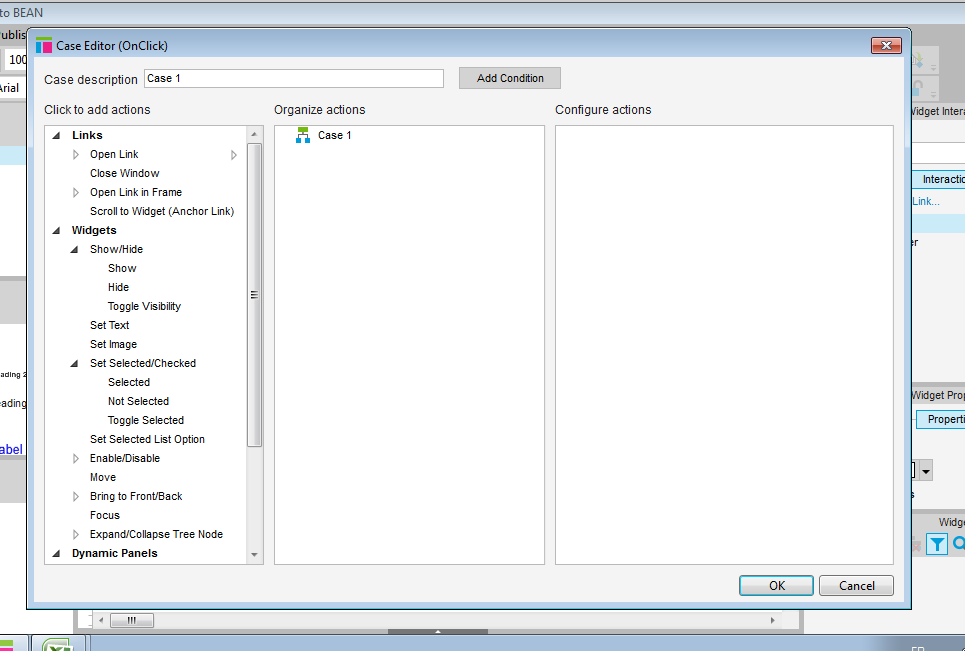
This dialog is divided into 3 columns. The first one shows you which actions can be triggered by clicking on the item.
The second shows you which actions are added to the current item and what their options are.
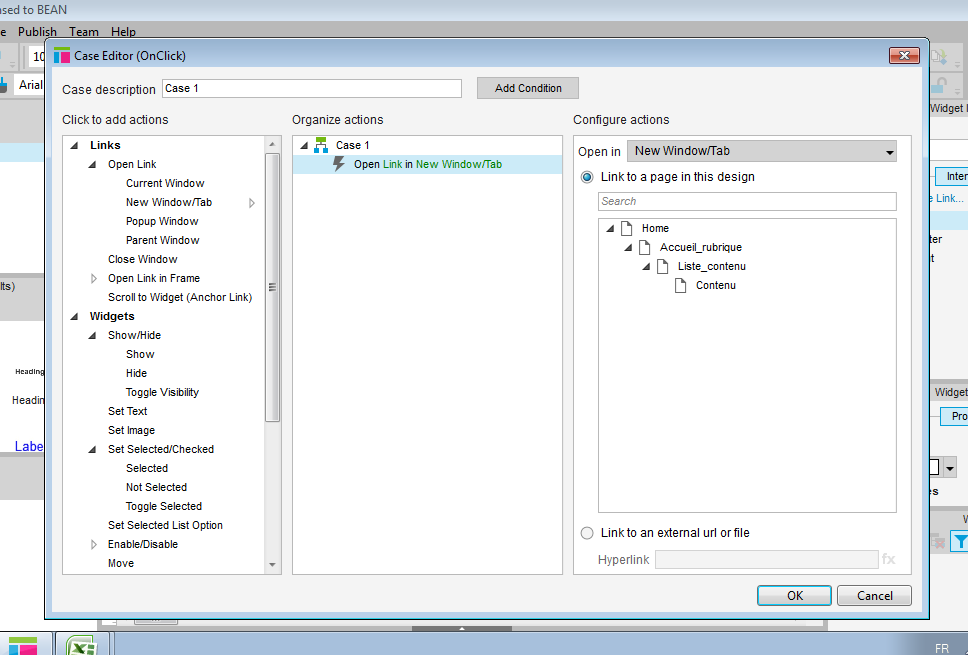
The third column will allow you to view and edit options for the selected interaction.
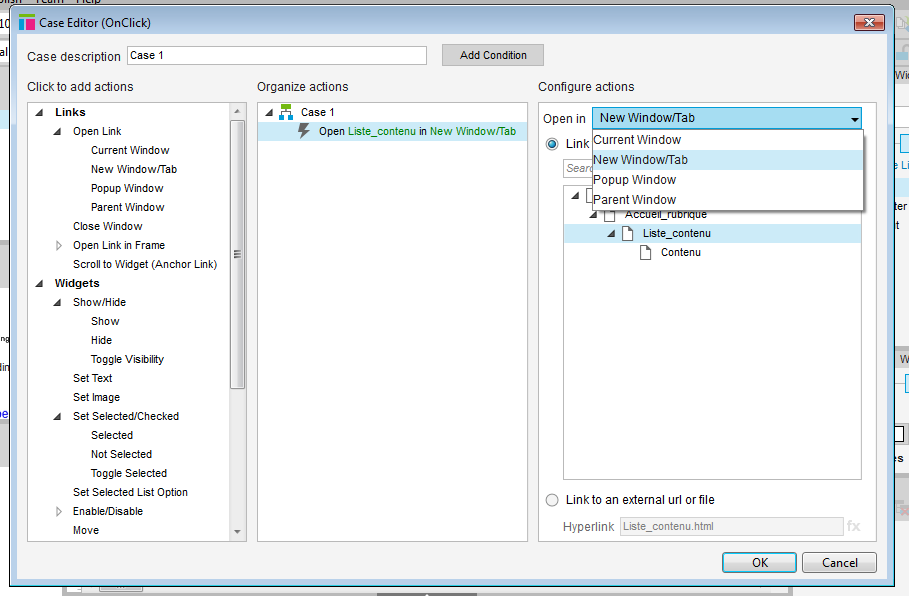
To navigate to a new page, select create link in the right column.
It will be added to the central column, and you can edit its options on the right side.
You can chose to open the link in the same window or a different one.
You can chose the target page of your link.
And at the bottom, you have the option to link to an external site.
Create a link back to a previous page
You can also add a link with special behavior, like a back button that will open the previous page, depending on how the user navigated through your interactive storyboard.
To do this, you need to select open the page in the “current window”. Then select, “back to previous page”.
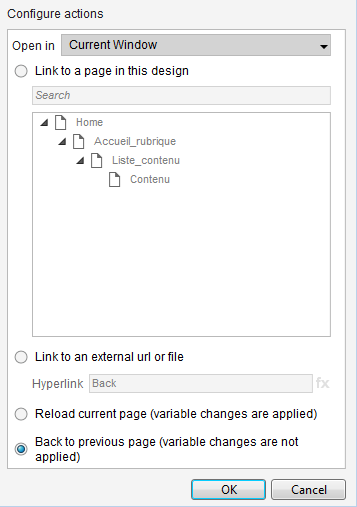
The options available are conditional to other settings. When creating a link, you will not have the same options if you open the link in the same window, in a new window or tab, or as a pop up.
With this, you know how to create a simple, browsable storyboard in Axure. Feel free to experiment with it. In the next post, we will cover simple interactions within a page, such as using anchors and displaying interactive content.
Articles on similar topics
Axure basics - creating within-page interactions with anchors and visiblity
Axure training, Beginner Axure tutorial, Training in wireframing interactive prototypes, Interactive wireframing,
Axure basics - creating within-page interactions with dynamic panels
Axure training, Beginner Axure tutorial, Training in wireframing interactive prototypes, Interactive wireframing,
Axure - optimal widget use to iterate painlessly
Axure training, Training in wireframing interactive prototypes, Interactive wireframing,
Axure - Creating menus with dynamic panels
Axure training, Beginner Axure tutorial, Training in wireframing interactive prototypes, Interactive wireframing,
Axure - How to create Masters and use them efficiently in Axure
Axure training, Training in wireframing interactive prototypes, Interactive wireframing,
Advanced Axure - Creating repeaters
Axure training, Training in wireframing interactive prototypes, Interactive wireframing,