Shadowrun level editor basic interactions - writing dialogs
- How to create a dialog in the Shadowrun Hong Kong level editor
- Creating a simple, linear discussion in shadowrun
- Adding content to a conversation node
- Starting a dialog with a description and possible answers
- Adding an interaction to start the dialog
- Test your in game discussion
In this tutorial, I’ll explain how to write a very basic (linear) discussion between two characters and add an interaction to dislay it in the Shadowrun Hong Kong level editor. We’ll have a look at the dialog options and basics conversation to talk.
How to create a dialog in the Shadowrun Hong Kong level editor
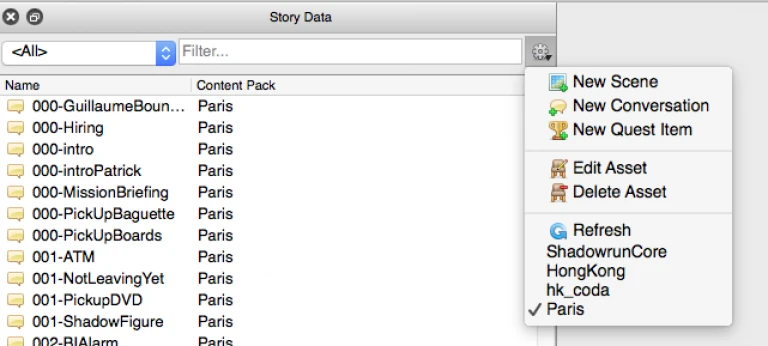
First, you need to create a dialog. In story data, click on the gear and select “New conversation”
The conversation editor will appear. Give your conversation a name to find it easily later on.

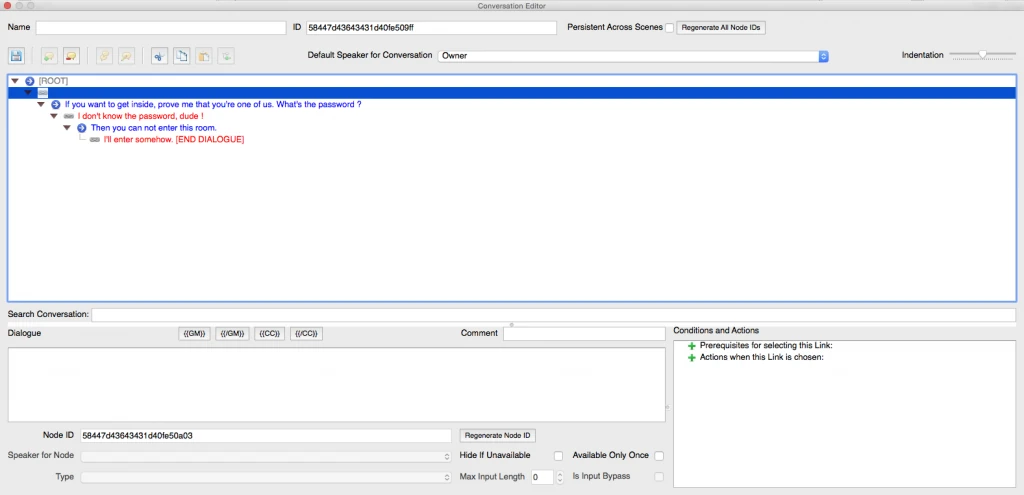
The conversation tree interface and its options
The top area of the dialog, as seen above, has options to add and delete conversation nodes, copy paste them and other options to integrate discussions in the game.
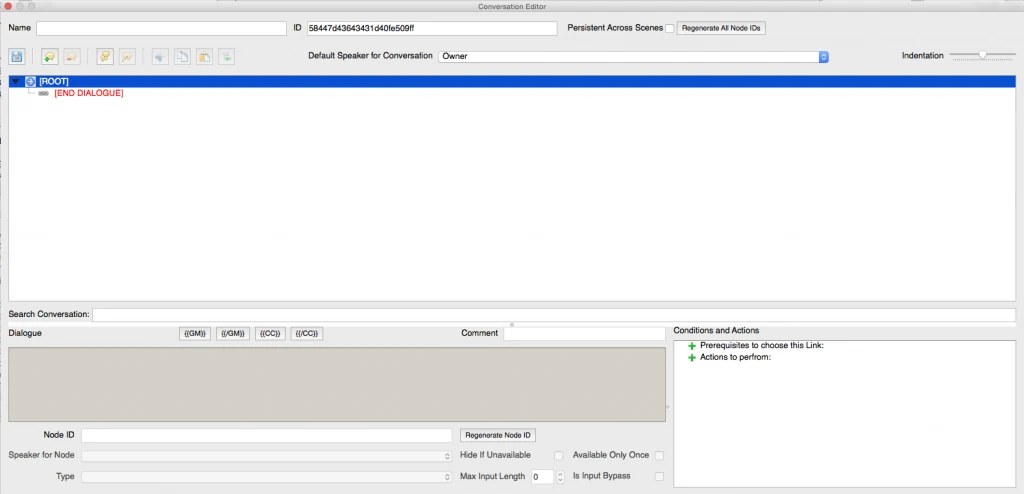
The central area represents the conversation tree. It displays all the conversation text you input, and the behavior you attach to certain nodes.
Typing area to edit discussions content and dialog options, conditions and actions
The lower area of the screen is where you can type the dicussion’s content. It’s greyed out in the screenshot above because nothing is selected that you can edit. Below the typing area you can set a few options specific to the conversation node such as if it can be used only once or repeatedly (be default).
The area to the bottom right lets you add conditions for conversation nodes to be displayed, and effect of discussions. For example, you can give the player an item through a dialog or update a quest status…
Creating a simple, linear discussion in shadowrun
Adding conversation nodes
For now, we’ll create a simple linear discussion. To do this, we’ll use the two buttons on the top left that have speech bubble with plus and minus icons. Select the top RED node, and click + to add an answer.
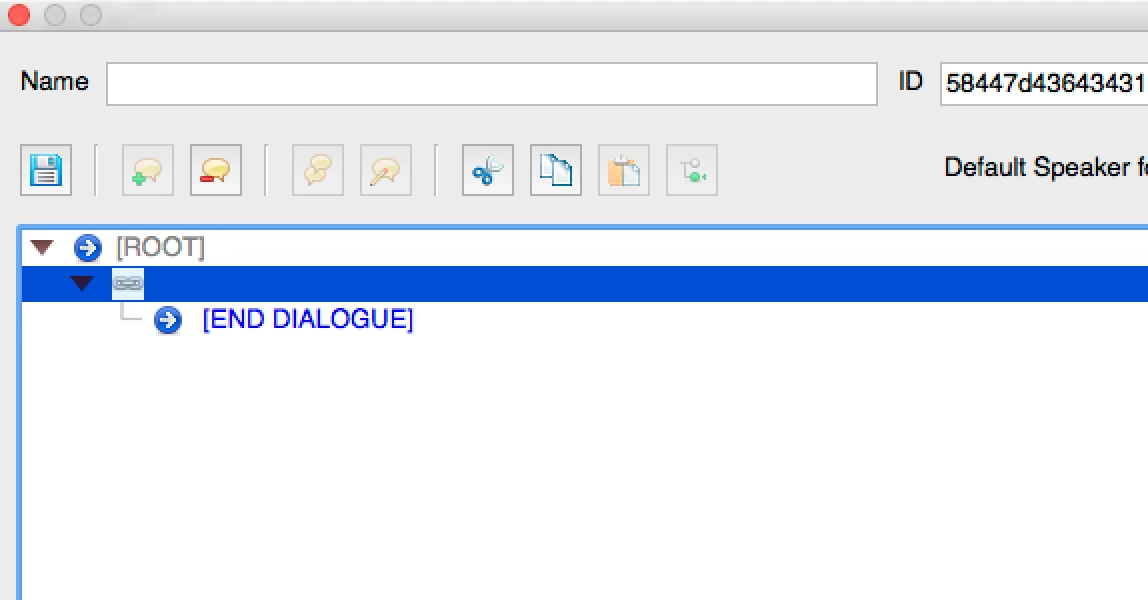
Red nodes are for player choices and blue nodes are NPC answers
You’ll notice the button becomes greyed out afterwards. RED node can have one child node. Blue nodes on the other hand can have multiple childs. Red nodes are player choices, so there can be many at a time. BLUE nodes are answers from non player characters, and there can only be one at a time. One RED node will always lead to a single blue response from the non player character.
In the screenshot below, I’ve typed inside the dialog box what which line corresponds to in the game so it’s hopefully a bit easier to understand.
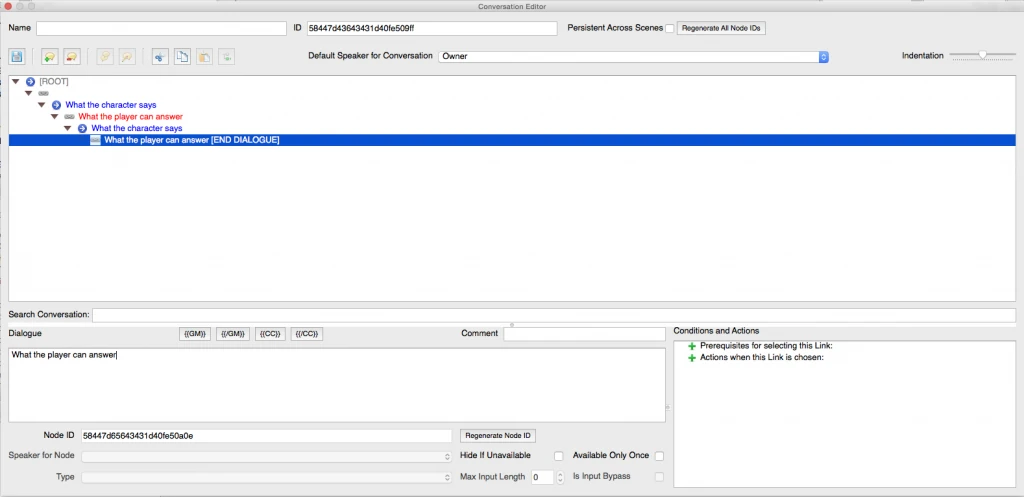
Empty nodes and end dialog nodes
Notice by default, if you don’t type anything into a new node, the last node will read [end dialogue]. This will end and close the discussion. If you have several red nodes at the same level and one of them reads “end dialogue”, the player will not have any choices and the discussion will always end by default.
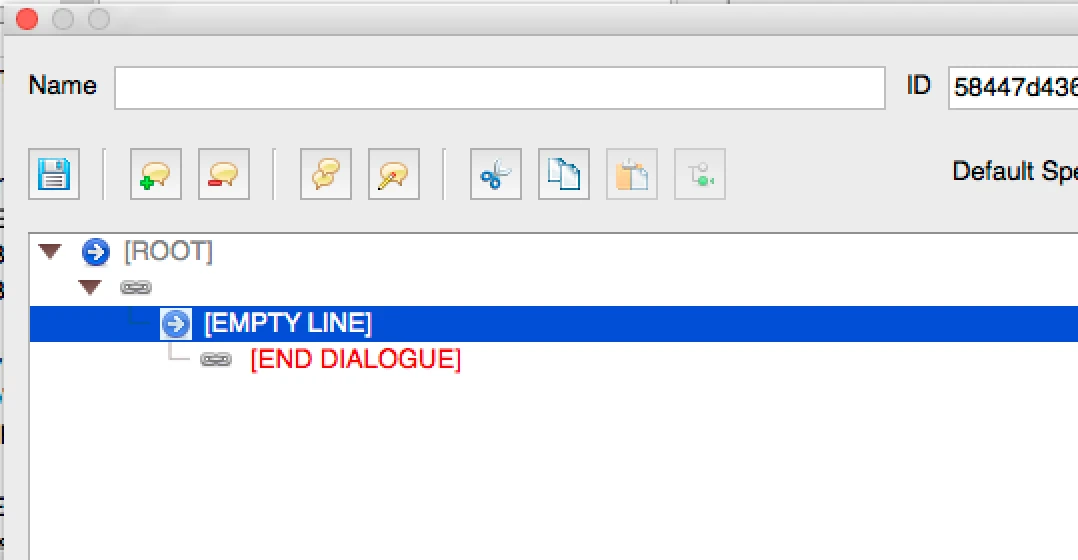
Red lines that contain no text are displayed empty. They will appear as a “next” button in the game, represented by three dots [ … ] and move the player to the next dialog.
Blue lines are marked “Empty line”. This means, whatever blue text was displayed before will remain in the top area. It will not display an empty top area.
Multiple red nodes will give the players choices to pick their answer from
If you add more than one red node at the same level, this will give the player multiple choices in the dialog. For now, delete any extra using the speech bubble – button if needed. We’ll look into giving the player multiple choices in the next tutorial.
Adding content to a conversation node
By default, conversation nodes will be said by their “owner” (NPc or object the discussion is had with)
Select each node and type the text you want in the area below. Then click the + icon again, select the next node and add the answer you see fit in the box below. You should get something like the screenshot below.
Adding descriptions to dialogs using the game master voice
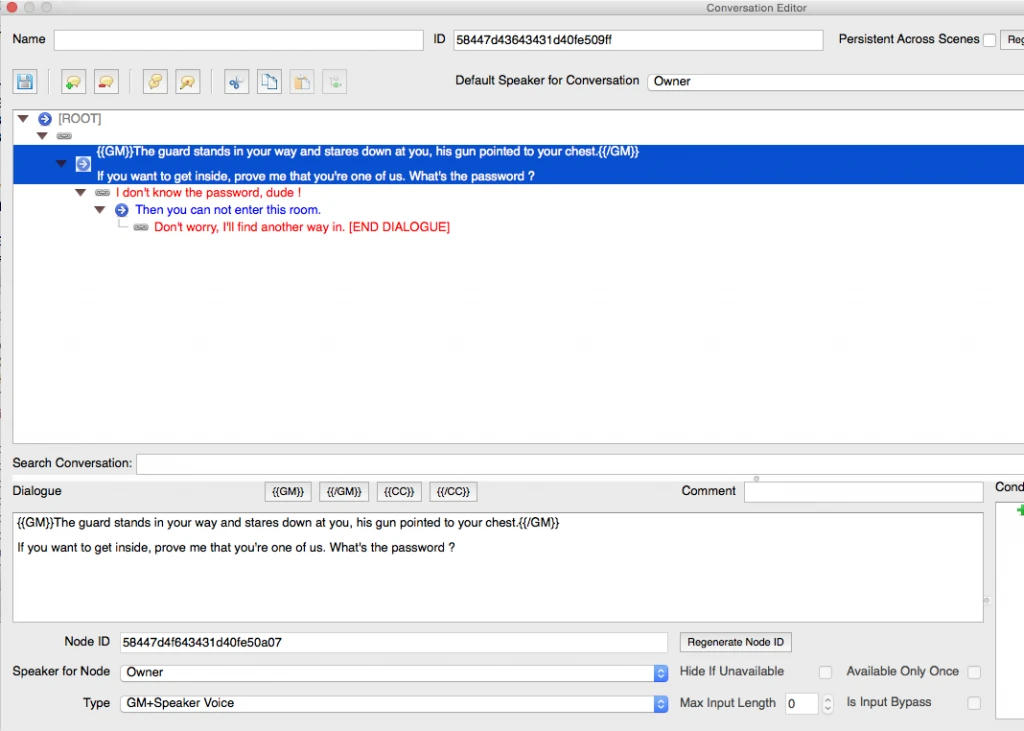
If you want to mix dialog text with descriptions, write the descriptions between the {GM} {/GM} tags. Don’t forget to also select the “GM + Owner” in the dropdown below. When you do this, the style of the speaker / character and the descriptive content will have a different look, descriptions being written between [ hooks ].
Starting a dialog with a description and possible answers
One thing that confused me when I started was that my discussions started with player options instead of a description with the player options below.
To add a description at the start of a discussion, simply leave the first player option blank. Your dialog will start with two blank nodes, the first “root” node, in which you can’t type, and an empty red node that you intentionnally leave blank.
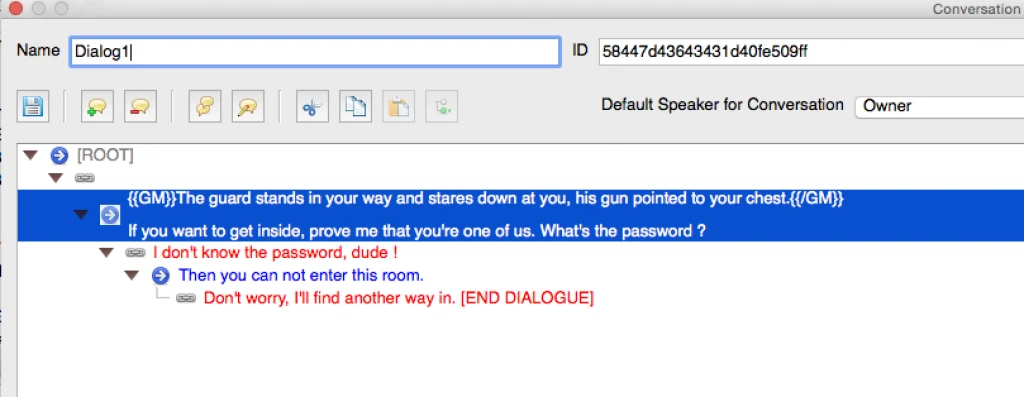
Doing so, the dialog will directly display the first blue text your write at the top with the option you wrote in red below.
Adding an interaction to start the dialog
Create the interaction on a prop
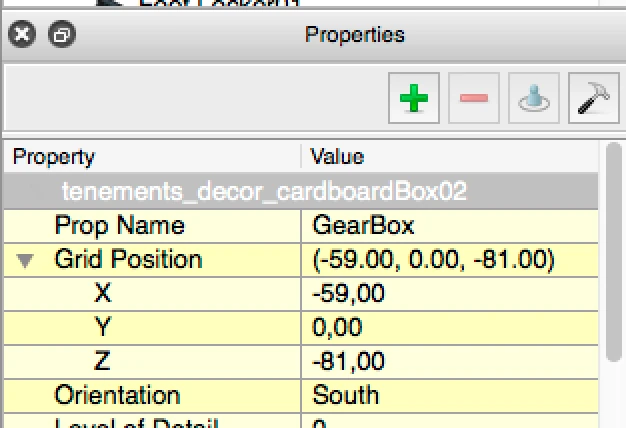
When you’re happy with your discussion’s content, go back to your level and select a random prop or character you’ve added to your scene as shown in a previous tutorial.
Hit the interaction button (hammer) as we’ve seen before. If you’re unsure how to do this, review the previous tutorials on adding other types of interactions.
Select the conversation interaction type
In this dialog, you’ll select the interaction type “conversation” in the first drop down menu. Then, select the conversation from the list, the same way as you would pick an item to pick up.
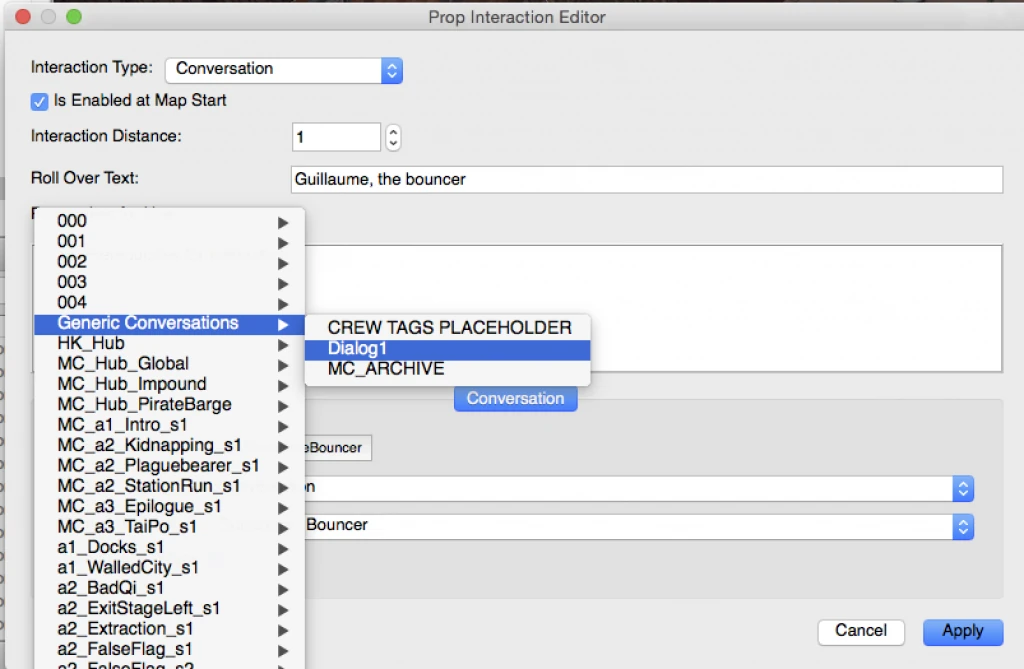
Chose your conversation from the menu
By default, if your conversation name has no minus symbol in it, you’ll find it in the generic conversations menu. I use numbers to sort discussions based on how far the player is in the game, so I’d usually name them “001-DiscussionName”. Of course, make up your own system so it’s most convenient for you.
Set the conversation owner
The last drop down of the interaction dialog lets you chose an owner. The owner defines what name and image will be displayed next to the speech when the character speaks to you. You can chose an item, like PDA or an NPC.
Test your in game discussion
Let’s run the game and test this. If you need a reminder of how to test the game, check out the first tutorials bout how to test a level.
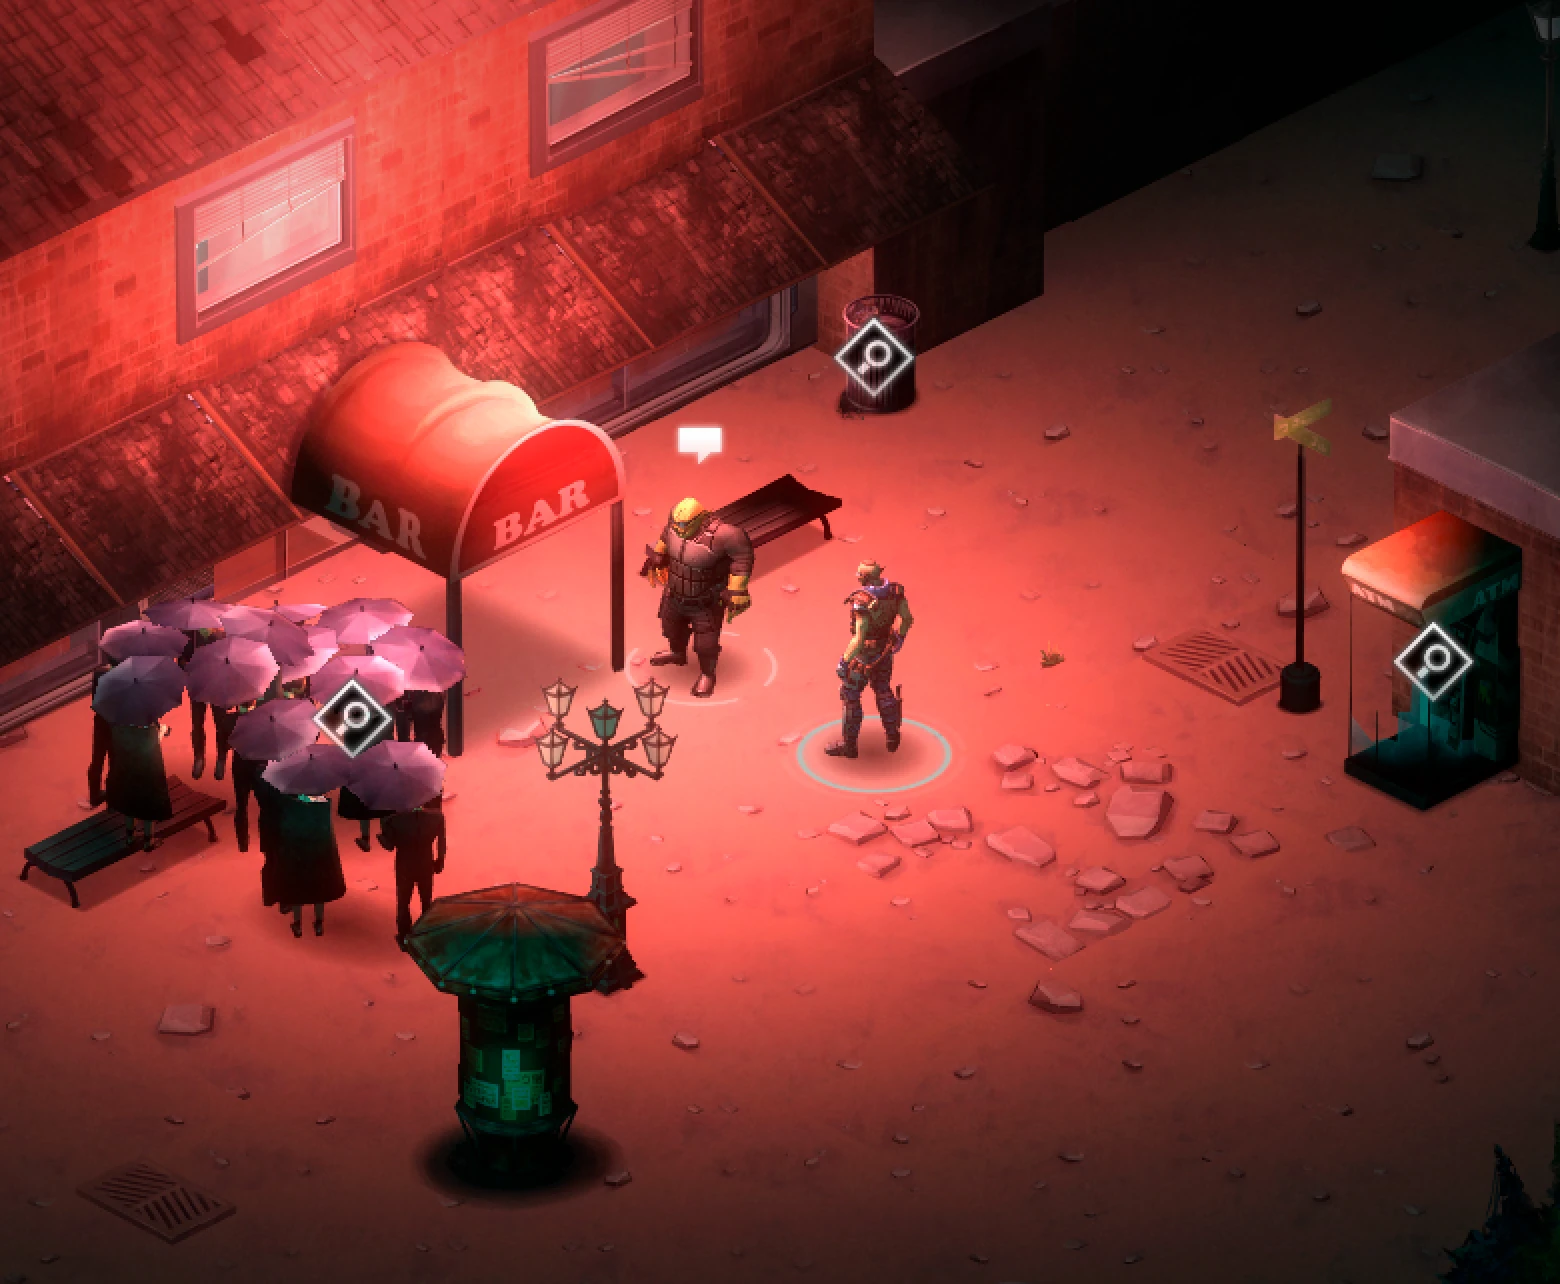
You should see a speech bubble icon above the prop or character you placed the interaction on.
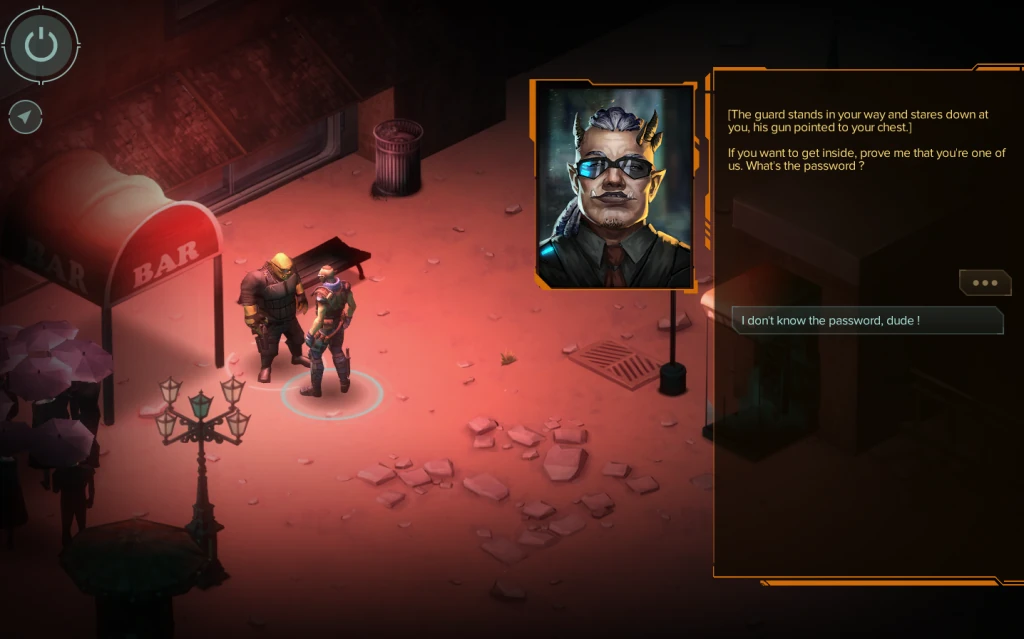
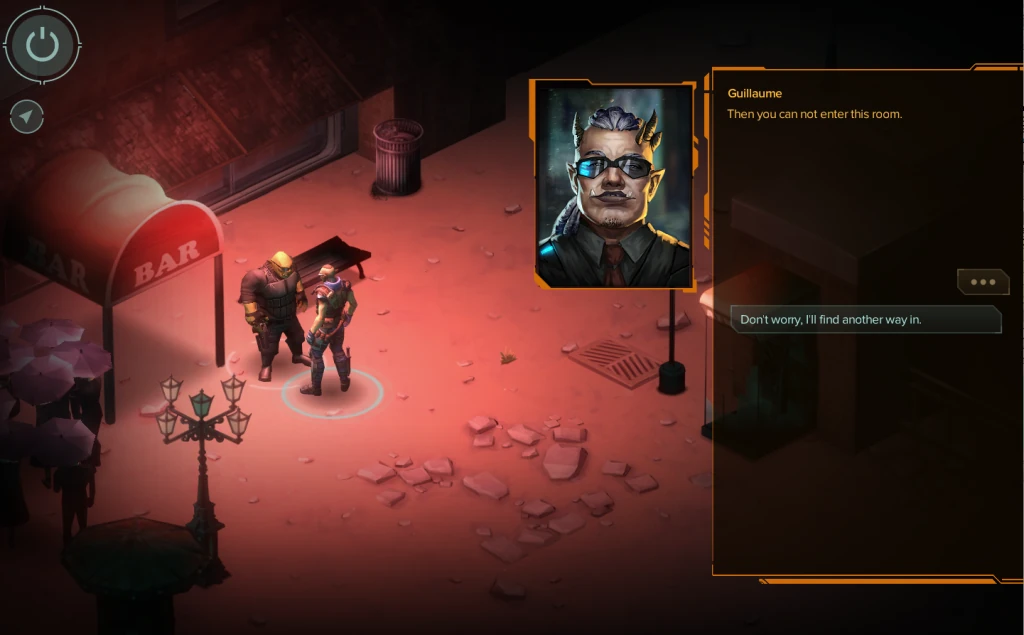
When talking, you should have text from your dialogs or descriptions at the top : what the othrer character says, with one button below the player can click to answer.
In the next tutorial, we’ll have a look at how to give the player multiple choices to answer.
Articles on similar topics
Shadowrun level editor - creating a new project
Game development tutorial, Shadowrun Dragonfall level editing, Shadowrun Hong Kong Level editor tutorials,
Shadowrun level editor - editing the path to the content packs
Game development tutorial, Shadowrun Dragonfall level editing, Shadowrun Hong Kong Level editor tutorials,
Shadowrun level editor - troubleshooting (mac)
Game development tutorial, Shadowrun Dragonfall level editing, Shadowrun Hong Kong Level editor tutorials,
Shadowrun level editor - creating a map
Game development tutorial, Shadowrun Dragonfall level editing, Shadowrun Hong Kong Level editor tutorials,
Shadowrun level editor - efficient wall placement and using height
Game development tutorial, Shadowrun Dragonfall level editing, Shadowrun Hong Kong Level editor tutorials,
Shadowrun level editor - picking up an item
Game development tutorial, Shadowrun Dragonfall level editing, Shadowrun Hong Kong Level editor tutorials,